
Insulation for Cavity Walls, Canberra
Cavity Wall Insulation Installation Process
Installing Insulation – Method Overview
Plugging the Wall Cavity
Plugging – When we undertake a wall insulation installation the very first step is to plug the wall cavity if the house is built on a suspended timber floor.
This prevents the Supafil wall insulation from falling out the bottom of the cavity.
This obviously is not required in houses that are constructed directly onto a slab.
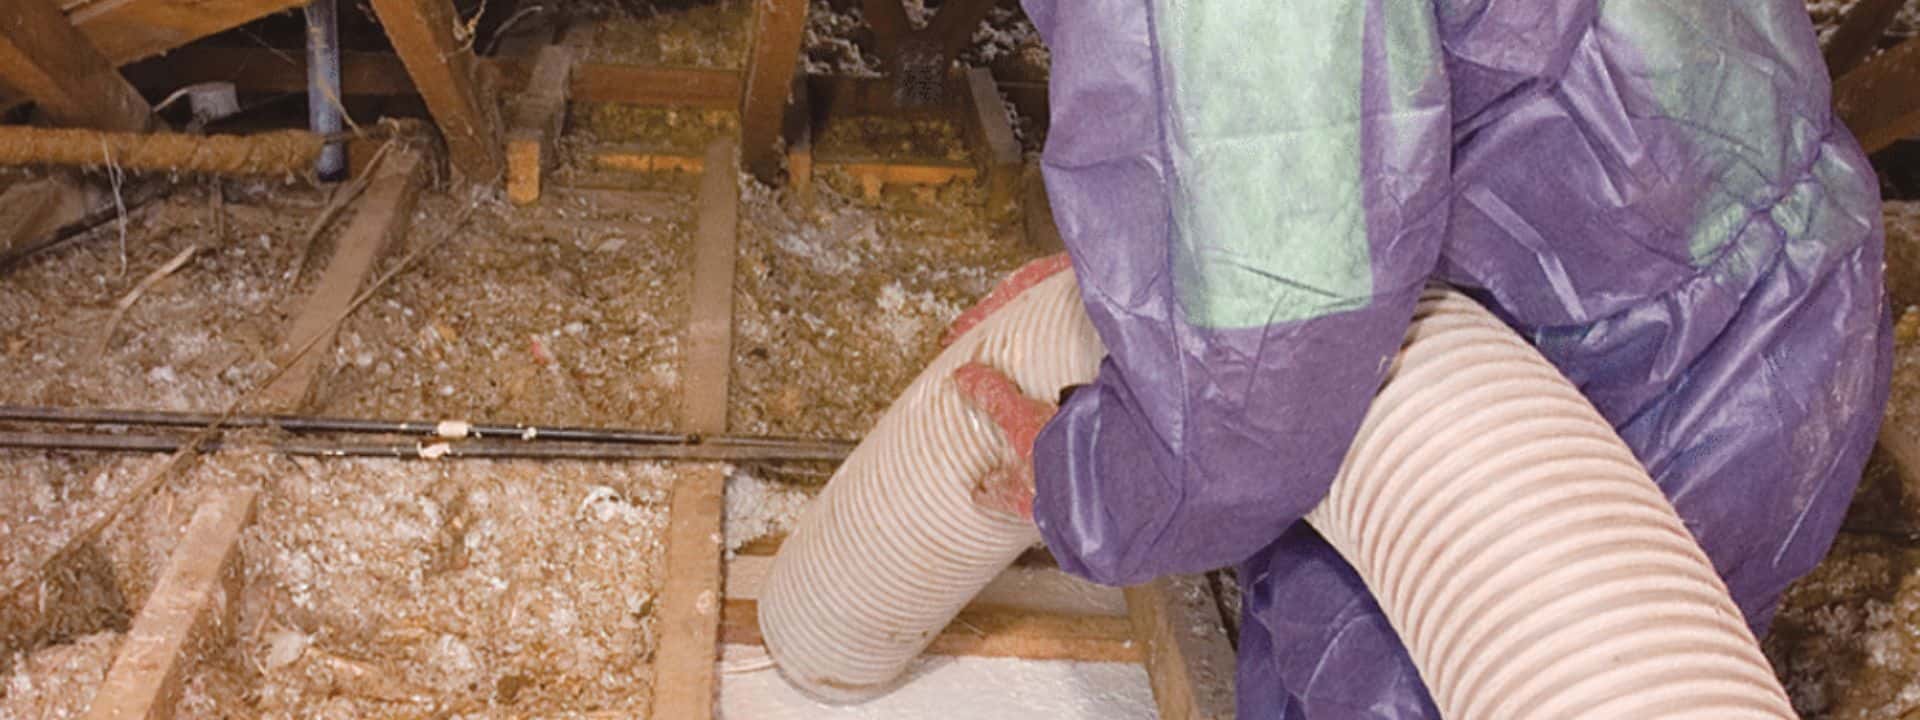
Filling from above insulation
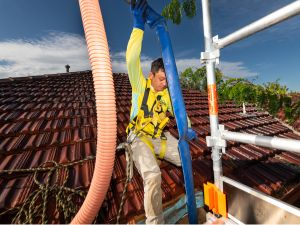 Filling from above – After the cavities have been filled our installation team begin filling the wall cavity from above on the ceiling. Roof tiles will be removed to gain access to the cavity. Using a lay flat style hose, similar to the hoses used for pumping water, it is easy to gain access to the narrow 50mm space.
The supafil product is then pumped through the hose and the cavity begins filling from the bottom. The operator then lifts the hose and continues to fill the cavity until the product reaches the top of the wall cavity.
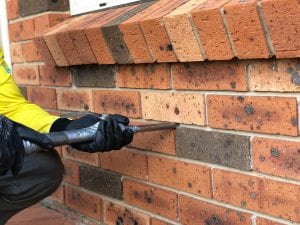
Filling under windows with insulation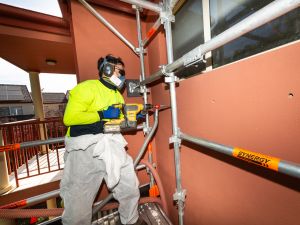
Filling under windows – The only areas that cannot be filled from above are under the windows and where obstructions from above such as solar panels exist. Here we need to gain access through a 16mm hole that is drilled into the mortar joint. The drill is small enough to only go through the mortar and in most cases not affect the brick work.
The supafil is then pumped into the wall cavities under the windows through these holes. The holes are then patched using colour matched mortar to leave the wall looking as it was before we began working.
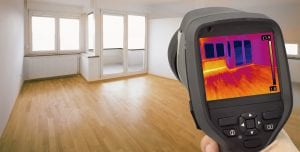 Thermal Camera Check
Thermal camera check – The final step in the wall insulation installation process is to do a thermal camera check. This ensures uniform coverage throughout and in the unlikely event of areas not being completely filled, this shows up clearly and these gaps can be topped up.
Our install guide has a lot more information about cavity wall insulation. If you haven’t already done so, download a copy below.
Contact Us Today
Don’t let poor insulation compromise your comfort and energy efficiency. Contact Alexander Watson Home Insulation to schedule a consultation and learn more about how our services can benefit your home.
Download our FREE insulation installation guide
continue reading
Related Posts

When we undertake a wall insulation installation the very first step is to plug the wall cavity if the house is built on a suspended timber floor.

When we undertake a wall insulation installation the very first step is to plug the wall cavity if the house is built on a suspended timber floor.
When we undertake a wall insulation installation the very first step is to plug the wall cavity if the house is built on a suspended timber floor.